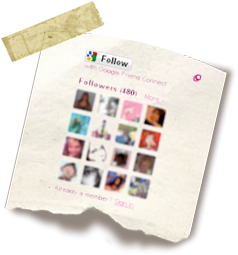
The tutorial below covers several key points to Following and Followers including ~
✻Adding the Followers Gadget
✻Following Other Blogs
✻Troubleshooting
✻Your Following List
If you're already familiar with one subject, simple scroll down to the area you find most helpful.
✻Newbie Flash: For those of you who aren't familiar with "Following", this is a nifty feature Blogger offers where you can keep track of the blogs you like. Following another blog adds that blog to a list which you can easily find by visiting the Dashboard section of your blog. There you can view the most recently posted blogs and add or delete from the list. To find the Dashboard area of your blog click on the "Design" link at the top right side of your own blog and then click on "Dashboard" found in the same area. There's a good bit of info on the subject offered from Blogger and you can read more on that by clicking here.
Now on with our tutorial...
Adding the "Followers" Gadget
Let's begin by adding this feature to your own blog. To do so, log into your blog and click on "Design" found at the top right side of your blog, outlined in pink in the image below...
Next click on "Add a Gadget"...
In the pop-up window, scroll down to "Followers" and click on the blue plus button...
Here you can rename the object if you want to be creative, some bloggers come up with terrific alternatives, or leave it as is. The title can always be changed in the future so just be sure to add the gadget by clicking the orange "Save" button...
You will now see the new "Followers" gadget at the top of your sidebar...
This is a good place to keep the gadget so visitors can easily find it, however you can also move the gadget around by clicking and dragging it to a different location if you prefer...
Once finished, be sure to click the orange "Save" button to set it's location...
And then click the blue "View Blog" to see your new gadget in action...
With that completed, let's now go over how to "Follow" someone's blog...
Following Other Blogs
Here are a few pointers for "Following" other blogs. Since the "Follow" feature is directly tied into our Blogger profile, you may want to take a look at my other tutorial which covers profiles. You can view "How to: Set up and Edit Your Blogger Profile" by clicking here.
First, we'll begin by navigating to a blog you would like to Follow. This is also a good time to mention that you can Follow your own blog. So, navigate to the blog you wish to Follow and click on the "Follow" button...
A pop-up window will appear and there you will see a few options ~ let's take a look at these...
Aside from the gray "Follow this blog" button which we will continue on with in a moment, you also have the option of Following publicly or privately and the blue "More options" link...
The public and private options include descriptions right there so let's explore the "More options" link. By clicking on that link the options expand and you'll see the following items...
The first section covers your name and profile...
Here you can edit your profile and can even change which profile you use to Follow blogs. This is a handy area in the event you're having difficulty Following others or the "Follow" feature is drawing from the wrong profile. For more info on this, please see the "Troubleshooting" section of this tutorial below.
Next we have the "Settings" section, again this area enables you to Follow publicly or privately...
And then finally there is the gray "Follow" button and the "fewer options" link... 
When you click the blue link it contracts back to the original view where you can then click the gray "Follow this blog" button...
Then click on the gray "Done" button... At this point your screen will refresh and you can scroll back down to view your own icon, now present in the list of "Followers"...
Troubleshooting
If you're experiencing issues with Following others, such as an incorrect profile showing up, then you can try these steps to remedy the situation.
Note: It should be noted that Blogger often experiences technical difficulties which can lend to issues with Following others. The information below is in lieu of Blogger not experiencing any of these issues currently.
First you can navigate to a blog you are currently Following and click on the "options" button just below your name...
Or second, navigate to a blog you are not currently Following and click on the "Follow" button, then click on the blue "more options" link...
Either method will take you to the Basics setting page for Following. Here you will see "Currently using your Blogger profile", go ahead and click the blue "Change" link... In this area you'll have the option to change OR reset where the Follow feature is drawing your profile from...
It will show you which profile you're currently using...
And give you a selection of other possible profiles to use...
Selecting your "Blogger" profile should reset any misdirections and help to ensure you're Following others with the correct profile...
Once complete you'll see a new pop-up, click "Close" to finish the reset...
You will now return to the previous window where you can click the red "X" to close this window...
As I mentioned at the beginning of this tutorial, be sure your Blogger profile is set up with all your info, to do this simply follow my other tutorial: How to: Setup and Edit Your Blogger Profile
Your Following List
You can always view the blogs you are Following and edit the list by visiting the Dashboard section of your blog. To find this area, click on the "Design" link from your blog...
Then click on the blue "Dashboard" link found at the top right side of your window...
In the Dashboard area, scroll down below your list of blogs and you'll see the "Reading List" area...
This is where you can view a list of the blogs you Follow along with an excerpt from their most recent blog postings. In this area you'll also see a few tabs to explore...
Becoming familiar with each tab and what it offers will help you keep track of the blogs you Follow and your Following list.
With that you're done ~ hopefully this has helped shed some light on the subject and even assisted you in gaining control of the blogs you most like to keep up to date with.
Enjoy!

Now all of my tutorials in one fabulous package for one low price

$10.95 buys the complete set of my digital tutorials
all 25 tutorials in PDF format ~ including my exclusive three part series
"How to Create Your Own Blog Background"
available only with this purchase.
Click the book above to purchase from my Etsy shop..


