
To use this tutorial you'll need to have a sidebar item selected that uses Html code. For example purposes we'll use my own blog badge seen below but you can also find a wide range of free inspirational sidebar buttons from this page: http://www.prl-images.com/blog_buttons.html
To install this badge on your own blog you'll need "grab" the code or "copy" it and "paste" it into an Html/Java Script gadget. If you need help understanding or practicing how to copy and paste with your mouse I recommend following along with this easy video tutorial: http://www.youtube.com/watch?v=mXRT2YH8EDM The most important thing to remember when copying and pasting html code is that if you loose a snippet of code it may affect how the button appears so be sure to "grab" all of the code.
So let's begin...
1. Begin by logging into your blog, and click "Design"...

2. Now navigate to the "Layout" section of your blog...

In this area you can see a skeletal view of your blog. Looking over the various sections you'll see the navigation bar, "Header" area, "Blog Posts" area, and any sidebars you have setup on your blog. This is where you can easily install, move around, and remove various gadgets for your blog. Clicking on "Add a Gadget" enables you to access a wide range of built-in gadgets that Blogger offers it's user.

So let's go on and access this area...
3. Click on the "Add a Gadget" link in the sidebar area of your blog...


This is where you can access all of the built-in add-ons that Blogger offers.
5. We're going to be using "HTML/Java Script" gadget so using the scroll bar, scroll down until you see that option...
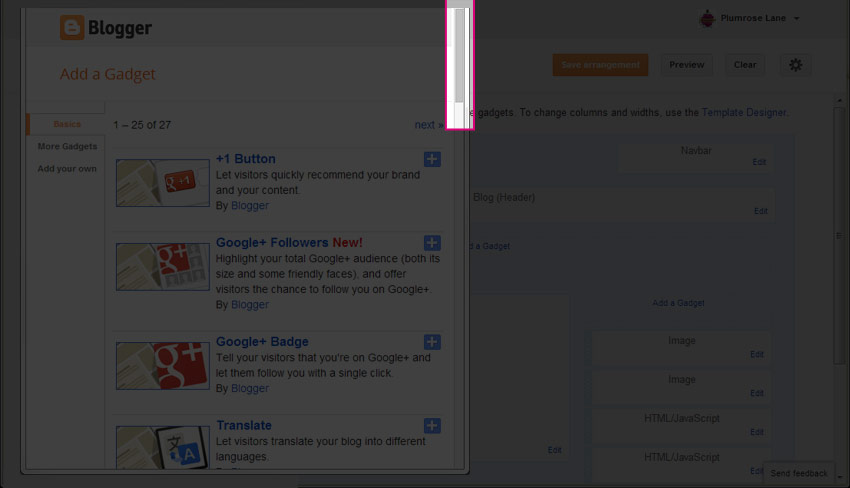

6. Now click on either the title or the blue + button...

In this area you'll now see where we can title your gadget and paste in any Html or Java Script code.
7. Going back to the code from my own blog badge at the beginning of this tutorial, copy the Html code and paste it into the large rectangle as shown below...

8. Type a simple title in, something easy like "new button" works and you can always change this or delete it later...

9. With that completed we can now click "Save"...

10. You will now see your new gadget present on your blog's Layout...

Now let's reposition this new gadget so we can remove that temporary title...
11. By clicking on the gadget with your mouse, you can easily drag the object to a new location within your layout...

12. Choose where you would like to place your new button and then click the "Save arrangement" button...

13. With that done, you can click on the "Edit" link within your new gadget to remove the temporary title...

14. Just be sure to click "Save" to keep your change...

15. Your new gadget will now be titled by it's default gadget title...

16. That's it! Congratulations ~ you've now added an Html/Java Script gadget! You can click the "View blog" button to view your new item...
Enjoy~
Thanks Sharon! Now I just wish I knew how to Create one!Hahaa
ReplyDeletehughugs
Ah that's what we graphic artists are for Donna~♥
DeleteThank you, a brilliant simple explanation and it works!
ReplyDeleteFirst, I LOVE your site!!! Also, thanks so much for this awesome tutorial. It worked and I learned something new!!
ReplyDeleteyour absolutly right ,thank you so much for your help its working (y)
DeleteHi Sharon! Quick question.. I have a few badges on my sidebar but I would like them to be all aligned in a row going down. How do I do this?
ReplyDeleteThanks :)
Lisa
Thanks for your comment Lisa ~ sadly I haven't a clue. I'm sure if you Google it you can find something though.
Delete♥Sharon
Thank you. Couldn't figure this out myself. Great instructions.
ReplyDeleteNewbie Pinay blogger here. I find it hard customizing my blogger account because unlike my tumblr account, this one's complicated for me but thanks to your tutorial. :D
ReplyDeleteThanks for commenting DPxiv ~ I know some of it's so overwhelming and that's why I wrote these tutorials, glad they help.
DeleteThank you for your help
ReplyDeleteAwesome! Thank you so much!
ReplyDeleteGreat! Thank you so much for the tutorial! It was a snap!
ReplyDeleteThank you so much for this!Please tell me how I can put fb badge on my blog?
ReplyDeleteYou should be able to go through Facebook and it will add the badge automatically through the steps.
Delete♥Sharon
Thank you so much! Your tutorial was so easy to follow - I find that most aren't and the end result is unsuccessful. I'll be back looking for more tips!
ReplyDeleteOMG!!! Thank you ssssoo much for sharing this info. I have been struggling and frustrated for days! And it walked me right through it! Thanks!
ReplyDeleteThank you for this!
ReplyDeleteThanks for the tutorial! It's really helpful! I manage to put up the Flipboard and Instagram badges with your help. Thanks again! Never been easier to add badges!
ReplyDeleteThanks! This was a simple explanation of exactly what I needed.
ReplyDeleteThank you for such clear instructions. Lainie xx
ReplyDeleteThank you. This was a life saver!
ReplyDeleteThank you so much, very helpful
ReplyDelete